What fastlane snapshot actually does
fastlane snapshot drives the iOS Simulator through your app via UI tests (XCUITest) and calls snapshot("screen_name") at each state you want to capture. It launches the Simulator for every device size and locale combination you've configured, runs the test suite, and saves PNG exports for each combination.
The output: a folder full of raw Simulator screenshots organized by device and locale. From there, frameit — another fastlane action — can apply device frames and overlay caption text defined in a JSON configuration file.
At full capability, the fastlane pipeline looks like this:
snapshotruns UI tests → raw screenshots for every device × locale combinationframeitapplies device frames and caption overlays to each raw screenshotdeliveruploads the finished screenshots to App Store Connect
This pipeline can generate 50+ localized, framed screenshots in a single terminal command. If it's set up and working, it's genuinely impressive.
The honest cost: setup and maintenance
The developer community's experience with fastlane screenshots is consistent: the initial setup takes significantly longer than expected, and the maintenance burden is real.
Setup complexity
To get snapshot running, you need:
- A working UI test target in your Xcode project (if you don't have one, create it)
- UI test code that navigates your app to each state you want to capture — this needs to handle authentication, onboarding dismissal, and any state that needs to be set up before the target screen
- A
Snapfileconfiguration listing your target devices and locales - Correct code signing setup so Simulator builds run without prompts
- Enough patience to debug the first run, which almost always fails on something environmental (Simulator version mismatch, a UI element that's slightly different in test builds, timing issues in animations)
For a typical indie app, the initial setup is a 4–8 hour investment. The fastlane documentation is good, but the real complexity is in your app's specific navigation and state management — that part can't be documented generically.
Maintenance burden
Once set up, snapshot tests break whenever your app's UI changes in ways that affect the captured screens. This isn't unusual — every meaningful feature release changes something in the UI. Each breakage requires:
- Identifying which UI test steps no longer match the current UI
- Updating the test code to navigate to the new state
- Re-running snapshot to verify the fix
For apps that ship updates monthly or more, this is a recurring maintenance task that pulls developer time away from product work. Several developers in the fastlane community report that their snapshot setup works well for 2–3 months after initial setup, then either falls behind as the UI changes, or requires periodic refactoring to keep current.
frameit limitations
frameit applies frames and captions, but the caption design options are limited compared to what you'd build manually. Caption text rendering, positioning, and font options all come from a JSON config file with a constrained feature set. Getting a polished result — matching the visual quality of a manually designed screenshot — often requires post-processing in Figma anyway, which partially defeats the purpose.
When fastlane snapshot makes sense
Fastlane automation is the right tool for a specific set of circumstances — and genuinely the best tool when those circumstances apply:
Many locales
If your app is localized into 10+ languages, manually producing screenshots for every locale is unsustainable. snapshot runs each locale automatically by switching the Simulator language. For an app with 20 locales × 6 device sizes × 5 screenshots, that's 600 unique images — automation is the only viable path.
Screenshots need real app data
Some apps' screenshots only make sense with real content loaded: a calendar app showing actual events, a finance app showing realistic account data, a social app with populated feeds. snapshot navigates the real app via UI tests, so you can seed mock data before capturing. Browser tools work with whatever screenshot you drop in — they can't generate the screenshot from live app state.
CI/CD integration
If you ship to the App Store on a regular cadence and want screenshots to stay current with every release automatically, integrating snapshot into your CI pipeline means you never have to think about it. The screenshots update whenever the UI changes — rather than lagging behind by however long since someone last updated them manually.
Team environments with a designated DevOps resource
The initial setup and ongoing maintenance is much more manageable when there's a developer whose role includes CI/CD maintenance. For a solo developer, every hour spent on snapshot setup is an hour not spent on the product.
When a browser tool makes more sense
For the majority of indie developers, a browser-based screenshot tool is the faster and more practical choice:
You're launching or iterating quickly
In the early stages of an app — before you've found product-market fit — the screenshots you ship today may be irrelevant in 60 days when the core feature set has changed. Spending 6 hours setting up snapshot for an app that's going to pivot doesn't make sense. A browser tool lets you go from Simulator export to App Store–ready screenshots in under 20 minutes.
You're running A/B tests frequently
Product Page Optimization tests require creating alternate screenshot sets — different captions, different backgrounds, potentially different featured screens. Each PPO variant needs to be designed intentionally, not auto-generated from UI state. This is where the visual design layer of a browser tool beats the automation approach: you're making deliberate creative decisions, not capturing a fixed app state.
You have 1–5 locales
At low locale counts, the math doesn't support automation. Five locales × 6 device sizes × 5 screenshots is 150 images — still a lot to make manually, but ezscreenshots' localization export handles this: maintain one caption set per language and export all device sizes in one pass.
Caption design quality matters to you
frameit's caption rendering is functional, not polished. If you care about typography, spacing, and the visual details that separate a professional-looking listing from a generic one — font weight, caption placement in the top third, consistent design across the set — a browser tool with direct visual control produces better output than a JSON config file.
The comparison in one table
| fastlane snapshot + frameit | Browser tool (ezscreenshots) | |
|---|---|---|
| Initial setup time | 4–8 hours | 15–20 minutes |
| Maintenance per update | 30 min – 2 hrs (if UI changes) | Minutes (re-drop screenshot, re-export) |
| Many locales (10+) | Excellent — runs all locales automatically | Supported but more manual per locale |
| Caption design quality | Limited (JSON config) | Full visual control |
| Real app data in screenshots | Yes — drives actual app via UI tests | No — you drop in a pre-taken screenshot |
| PPO variant creation | Requires test code changes | Change caption/color, re-export |
| CI/CD integration | Yes — can fully automate | No (browser tool, not scriptable) |
| Best for | 10+ locales, regular release cadence, team environment | Solo devs, early-stage apps, PPO testing |
Using fastlane for delivery, browser tool for design
The two approaches aren't mutually exclusive. A common pattern that works well:
- Design and export screenshots in a browser tool — get the visual design right, verify caption placement, export at the correct dimensions for every device size
- Use
fastlane deliverto upload the finished screenshots to App Store Connect without touching the App Store Connect web UI
This gives you the visual control of a browser tool and the delivery automation of fastlane, without the complexity of snapshot's UI test infrastructure. deliver reads screenshots from a local folder and uploads them to the right device slots automatically — it's the most useful part of the fastlane screenshot stack for many developers.
Getting screenshots right before any tool decision
Whatever tool you use, the screenshots that ship need to follow the same visual rules: caption in the top 40% of the image (the App Store search result crop), non-white background for contrast against the App Store card, outcome-focused caption language, Bold or Black font weight. These don't change based on how the screenshots were generated. For the full breakdown, see the App Store screenshot template guide.
For the required pixel dimensions per device class — which you'll need whether you're configuring snapshot's Snapfile or exporting from a browser tool — see the App Store screenshot sizes reference.
ezscreenshots handles all Apple device sizes from a single design session — drop in your Simulator screenshot, set your background and caption, and export the full device set. No Xcode UI tests required.
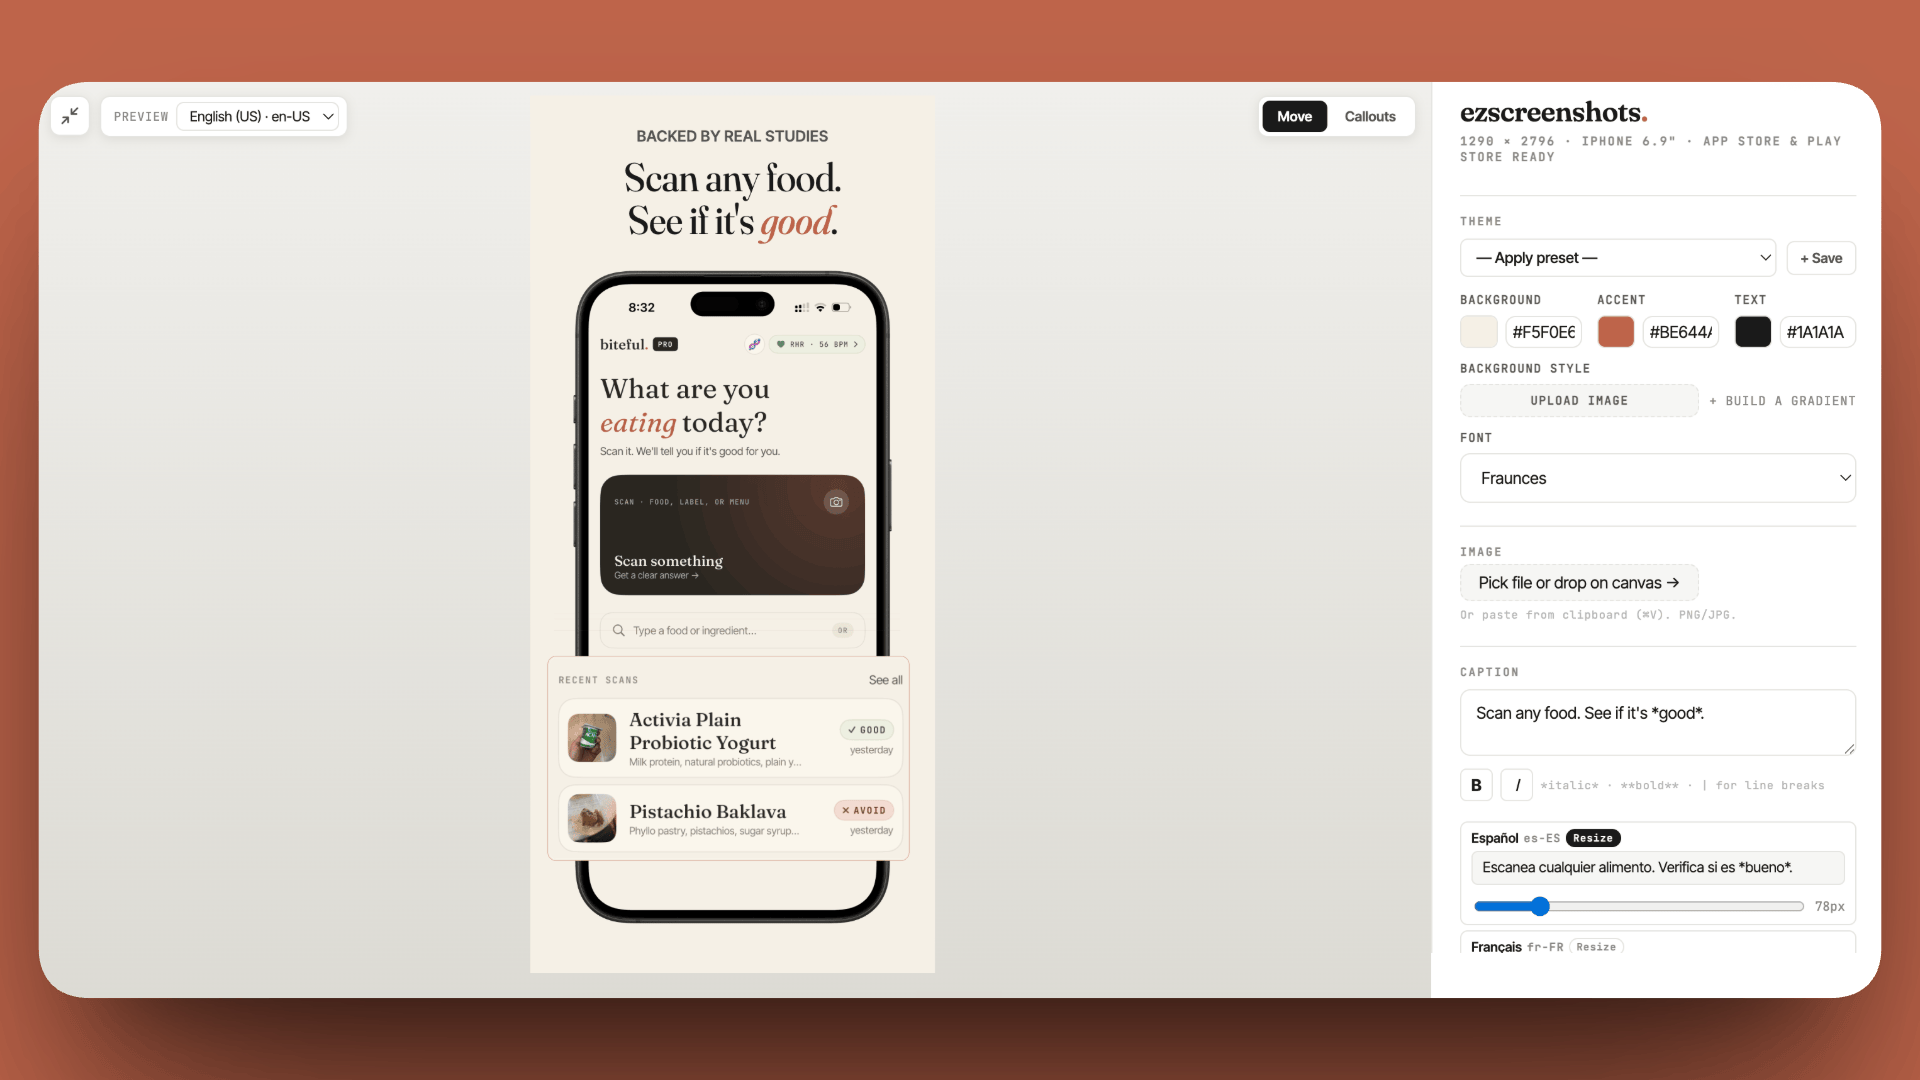
From Simulator export to App Store–ready in 20 minutes
Drop your screenshot into ezscreenshots, add your caption in the top third, set your background, export at every required device dimension. No UI tests, no Ruby setup, no Snapfile. Free, no account needed.
Try ezscreenshots →Summary
- fastlane snapshot drives your app via XCUITest and captures screenshots at every device × locale combination — powerful automation, but 4–8 hours of initial setup and ongoing maintenance when the UI changes
- frameit applies device frames and captions, but caption design is constrained to a JSON config — not the same visual control as a design tool
- Snapshot is worth it when: 10+ locales, screenshots need real app data, CI/CD integration is required, or a team resource can own the maintenance
- Browser tools are the better call when: early-stage app, running PPO tests frequently, 1–5 locales, or you care about caption design quality
- Hybrid approach: design in a browser tool, upload with
fastlane deliver— you get visual control without snapshot's complexity - The visual rules don't change regardless of tool: caption in top 40%, non-white background, outcome language, Bold font weight