The honest answer: start free
Most solo Android developers asking about ASO tools are looking for a shortcut past the expensive enterprise platforms. The honest answer: for a solo developer with one to five apps, you can get most of the signal you need for free — from Google Play Console itself, from manual competitor research, and from Play Store autocomplete. The paid tools add precision and speed; they don't add a category of information that's otherwise unavailable.
That said, the free tools have real gaps. Here's a clear breakdown of what each tier actually gives you, so you can make an informed decision about where to spend.
The free tier: what you can do without paying anything
Google Play Console (free, and the most accurate data you'll get)
Your Play Console account has more useful data than most developers realize. The key reports:
- Acquisition → Store Listing → Search terms: Shows the exact queries that led users to your listing (with impressions, store listing visitors, and installs). This data comes directly from Google — it's more accurate than any third-party tool's estimates.
- Store Listing Experiments: Google's built-in A/B testing for icons, screenshots, feature graphics, and short descriptions. Free, runs on real traffic, statistically rigorous. This is the single most underused tool in Android ASO.
- Ratings → Reviews: Track review sentiment and respond. Review velocity and rating are ranking signals on the Play Store, same as the App Store.
- Android Vitals: Crash rate, ANR rate, battery usage. Google explicitly says that apps with poor vitals are ranked lower. This is a ranking factor most developers ignore because it feels like a dev problem, not a marketing problem.
Play Store autocomplete (free keyword research)
Open the Play Store on any Android device and start typing your primary category keyword. The autocomplete suggestions are Google's own data on what users actually search for. Work through every letter combination: "habit t", "habit tr", "habit tra" — each autocomplete result is a real search query with real volume.
It's tedious compared to a paid keyword tool, but it's sourced from the same data. For a first keyword pass before launch, it's entirely sufficient.
Competitor listing analysis (free)
Your top competitors' Play Store listings are public. Read their titles, short descriptions, and full descriptions carefully — the keywords they repeat are the ones they've found convert. Look at their screenshots: what claim does the first screenshot make? How many screenshots do they use? Do they use a feature graphic?
Manual competitor analysis is slow but surprisingly high-signal. A pattern that appears across three to four top competitors in your category is almost certainly a keyword worth targeting.
Free tiers worth knowing
App Radar (free tier)
App Radar offers keyword tracking and competitor monitoring with a limited free tier — enough to track a handful of keywords and see basic rank movement. Good for monitoring whether your metadata changes are having an effect without committing to a paid plan.
AppFollow (free tier)
AppFollow tracks ratings, reviews, and keyword rankings with a free tier covering one app. The review monitoring is particularly useful — get notified when new reviews come in so you can respond quickly (response rate and recency affect conversion).
Appfigures (free tier)
Appfigures aggregates download and revenue data across platforms. The free tier is limited but useful for tracking trend direction without needing to check multiple dashboards.
The paid tier: when it's worth it
Paid ASO tools earn their cost when:
- You're doing serious keyword research pre-launch and want volume estimates, not just autocomplete suggestions
- You want to track competitor keyword rankings (which keywords are they ranking for that you're not?)
- You're managing multiple apps and need aggregated dashboards
- You're running paid UA campaigns and need to correlate ASO performance with ad spend
AppTweak (~$69/month entry)
AppTweak is the most developer-friendly of the major platforms. Strong keyword research, clean competitor analysis, and a keyword suggestion engine that surfaces mid-tail terms you'd miss with manual research. The entry plan covers one app with limited keyword tracking — enough for a solo developer's primary app.
Mobile Action (~$69/month entry)
Mobile Action skews more toward marketing teams running paid UA alongside ASO. If you're running Apple Search Ads or Google UAC alongside your organic optimization, the cross-channel view is useful. For pure organic ASO, AppTweak tends to be more focused.
Sensor Tower / data.ai (enterprise pricing)
Both Sensor Tower and data.ai are enterprise tools with enterprise pricing — starting at several hundred dollars per month and often requiring a sales conversation. Genuinely powerful for market intelligence and competitor deep-dives, but not the right fit for a solo developer optimizing a single app. The download estimate accuracy has also been questioned; one developer in the original thread noted uncertainty about whether paid tool data changes actually correlated with install improvements.
The highest-leverage investment: screenshots
Across all the ASO discussion in the developer community, one pattern stands out: keyword work gets you to a page; screenshots determine whether users download. A developer in the original thread put it clearly: "The high-leverage stuff: nailing your primary keyword in the title, having a first screenshot that communicates value instantly, and collecting reviews consistently. Everything else is optimization on top of that foundation."
For Android specifically, the Play Store shows three screenshots in portrait orientation before a user expands your listing. Those three images — and especially the first one — do most of the conversion work. Google's own Store Listing Experiments make it easy to test screenshot variants and measure the impact directly.
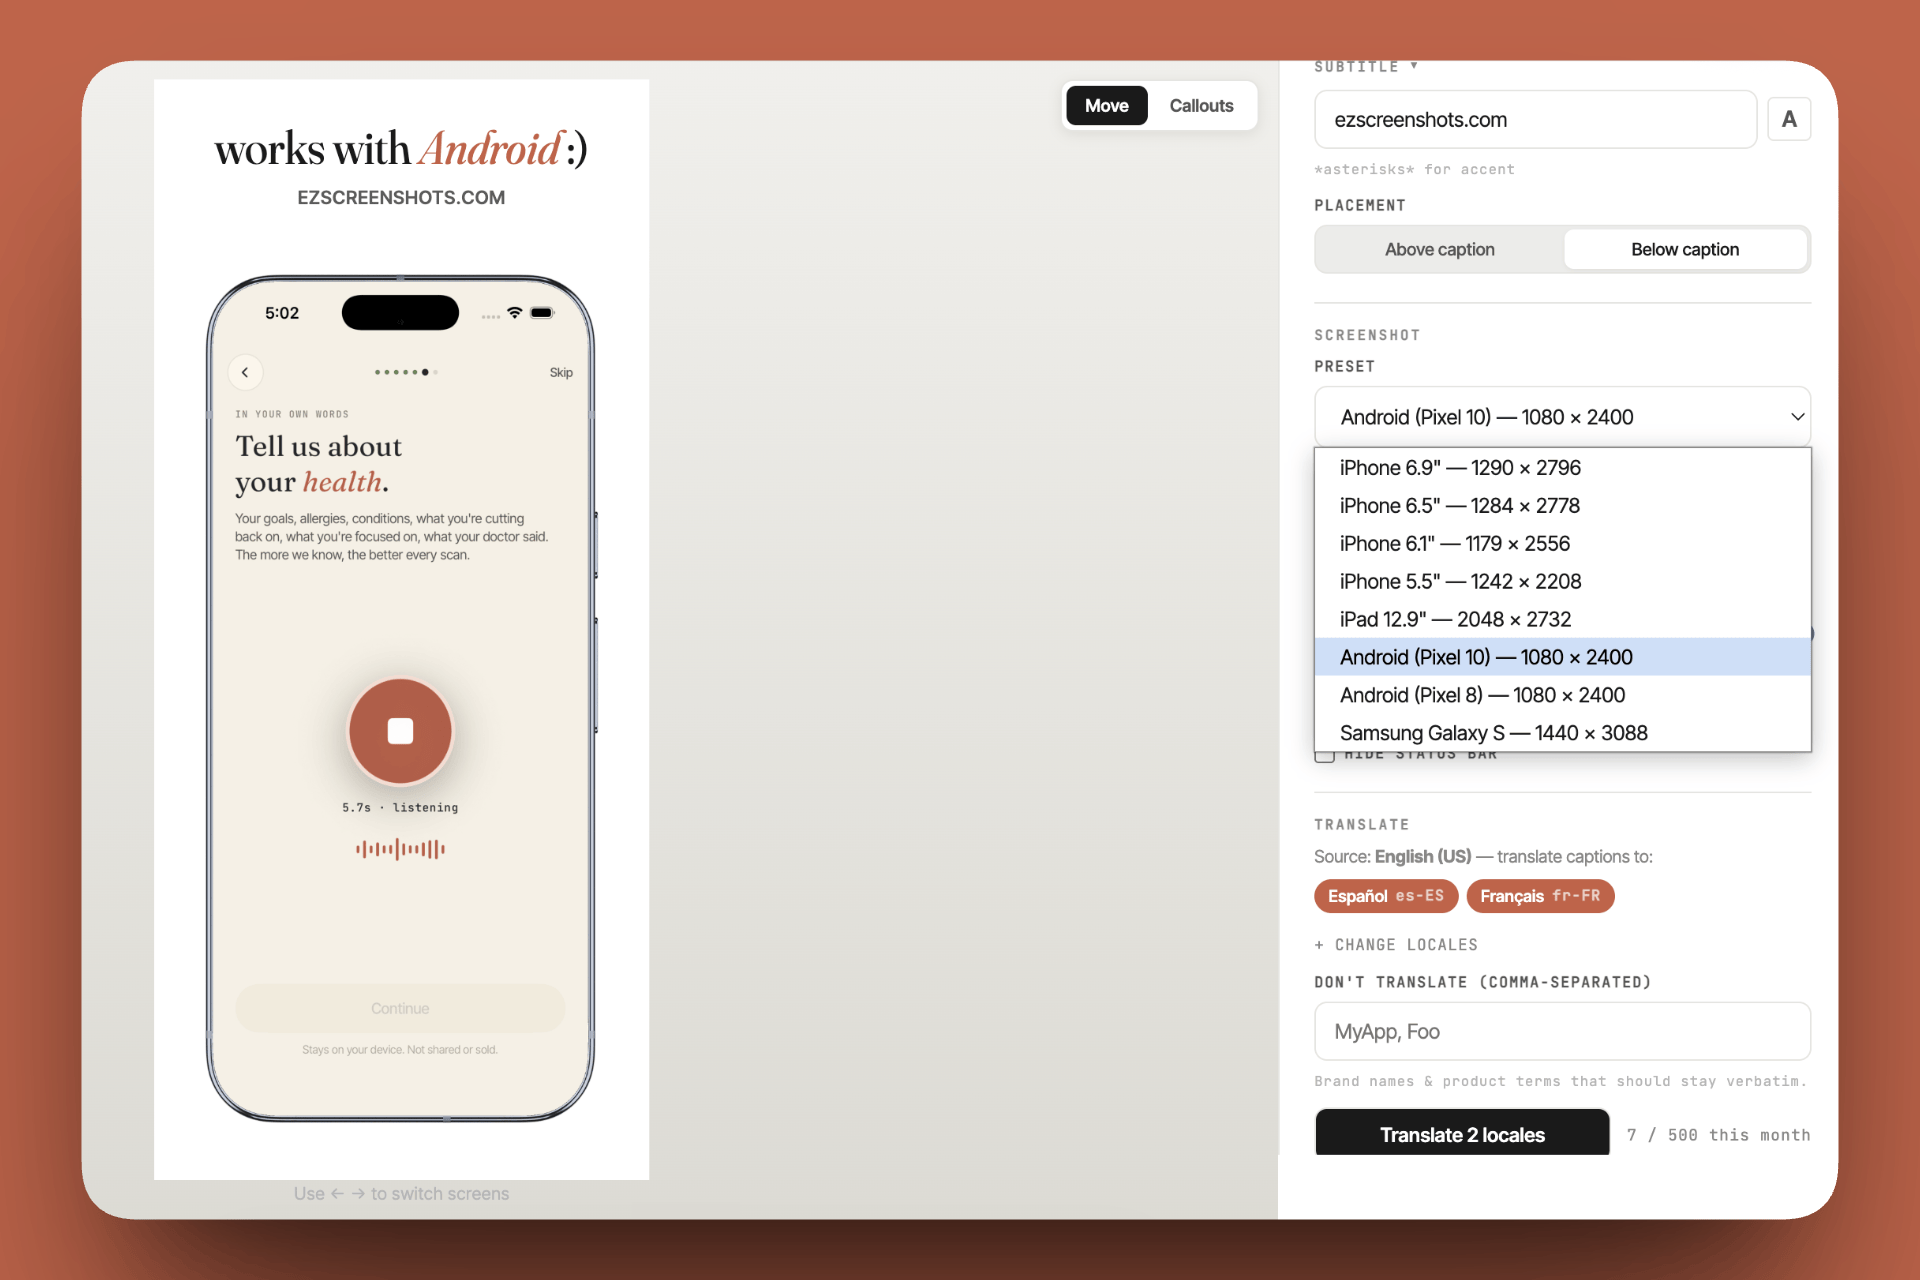
A tool like ezscreenshots has built-in Android phone presets — pick the canvas size, drop in your Simulator or device screenshot, add a caption and background, export. The same tool handles iPhone if you're on both platforms, so you're not managing two separate workflows.
Play Store vs App Store: key ASO differences
If you're publishing on both platforms, the ASO mechanics differ in a few important ways:
| Factor | Google Play | App Store |
|---|---|---|
| Keyword indexing | Full description is indexed — every word in your 4,000-character description can rank | Only title, subtitle, and 100-character keyword field are indexed |
| A/B testing | Store Listing Experiments (free, built-in) | Product Page Optimization (free, built-in) |
| Screenshot dimensions | Flexible — 16:9 or taller, 320px–3840px on any side | Strict per-device sizes — see the full guide |
| Feature Graphic | 1024 × 500px banner shown above screenshots when a Preview video is present | No equivalent |
| Performance signals | Android Vitals (crash rate, ANR) explicitly affect rank | Stability signals believed to affect rank, not confirmed |
| Review response | Response rate and recency are ranking signals | Less direct signal, but affects conversion |
A practical starting workflow
If you're starting from scratch with a new Android app and a limited budget:
- Keyword research: Play Store autocomplete + competitor listing analysis. Target mid-tail terms (2–3 words) where you can realistically rank, not head terms dominated by incumbents.
- Metadata: Primary keyword in your app title. Supporting keywords woven naturally into your short description (80 characters) and full description — Google indexes the full text.
- Screenshots: Design three strong portrait screenshots for the above-the-fold Play Store view. First screenshot = your primary value proposition. Use ezscreenshots for the design; it exports at Play Store-compatible dimensions.
- Launch and collect baseline data: One month of Play Console search term data tells you more than any pre-launch keyword estimate.
- Run a Store Listing Experiment: Test a screenshot variant against your baseline. Let it run until you reach statistical significance (Play Console tells you).
- Iterate on what the data shows: If search terms report shows impressions but poor conversion, fix screenshots. If impressions are low, fix keywords.
Play Store screenshots that convert
Android phone preset built in. Drop in your screenshot, add a caption and background, export at the right dimensions. Free, no account needed.
Try it free →Summary
- Start with Play Console — the search term report is more accurate than any paid tool and it's free
- Free keyword research: Play Store autocomplete + competitor listing analysis covers most ground
- Free A/B testing: Store Listing Experiments, built into Play Console
- Paid tools worth considering: AppTweak (~$69/mo) if you need keyword volume data or competitor rank tracking
- Skip for now: Sensor Tower / data.ai — enterprise pricing, not solo-dev ROI
- Highest-leverage action: Better screenshots. Google shows three before users expand your listing — those three images determine most of your conversion rate
- Android Vitals: Crash rate and ANR rate affect ranking — don't ignore them as an "engineering problem"