Why device frames work
When a user scans App Store search results, they're processing dozens of listings quickly. A screenshot displayed as a raw UI rectangle requires the viewer to do cognitive work — is this a web app? A desktop app? A mobile app? What device is this for? A device frame answers all of those questions instantly and lets the viewer focus on the actual content.
Beyond context, framing does something visual: it creates a boundary between your screenshot and the background, making the content pop rather than bleed into the card. An iPhone mockup with a gradient background reads as a finished, professional asset. The same screenshot without a frame, on a white background, reads as a draft.
Top-performing App Store listings on both iOS and Android use device frames on the majority of their screenshots. It's not a hard requirement — Apple accepts framed and frameless screenshots — but it's a strong default for any app where visual polish signals product quality.
What Apple actually says about device frames
Apple's App Store Review Guidelines require that screenshots "accurately represent the app." This means the UI shown must match what the current version of the app actually looks like. Adding a device frame around a genuine screenshot doesn't violate this — the content is still accurate.
What does violate it: using a device frame to imply features that don't exist, showing UI from a different app version, or using a frame that makes the screenshot look like a different device category than the one being targeted. If you're submitting iPhone screenshots, the frame should be an iPhone. Using an iPad frame for iPhone screenshots, or a MacBook frame for a phone app, would be misleading.
Apple also publishes official Marketing Guidelines with device artwork you're licensed to use — clean line-art renders of current iPhone and iPad models. These are the correct frames to use if you want guaranteed compliance.
Framed vs frameless: when to use each
| Use a device frame when… | Skip the frame when… |
|---|---|
| Your screenshot background is the same color as the App Store card background (white on white disappears) | Your screenshot content is visually strong enough to stand alone — a full-bleed illustration or high-contrast UI |
| You're showing a UI-heavy screen where context ("this is a phone app") helps the viewer parse the content | You're showing text-heavy screenshots where the frame takes up space that could be used for content |
| Your listing design uses a consistent background color or gradient across all screenshots | Your app has a distinctive full-bleed visual style (e.g. a game) where the frame would break the aesthetic |
| You want to show multiple screens at different sizes in a single screenshot (a phone + a zoomed detail) | You're tight on vertical space and a caption needs to share the top third with a large phone frame |
When in doubt, use the frame. The cases where frameless outperforms are specific; the default benefit of framing (context, polish, separation) applies broadly.
The 3D perspective option
Beyond a flat device frame, some of the most visually distinctive App Store screenshots use a tilted or 3D perspective — the phone shown at an angle rather than perfectly upright. This creates depth, makes the screenshot stand out in a row of flat listings, and works particularly well for the first screenshot where you want to catch attention before a user taps through.
A 3D perspective render used to require Figma or Sketch with a perspective plugin, or a dedicated mockup generator. ezscreenshots has a built-in perspective slider — drag to tilt, adjust the angle, and the perspective is applied live before you export. No separate tool required. The effect is subtle when used well: a slight tilt that implies depth without distorting the legibility of the UI content.
How to add a device frame in ezscreenshots (no Figma needed)
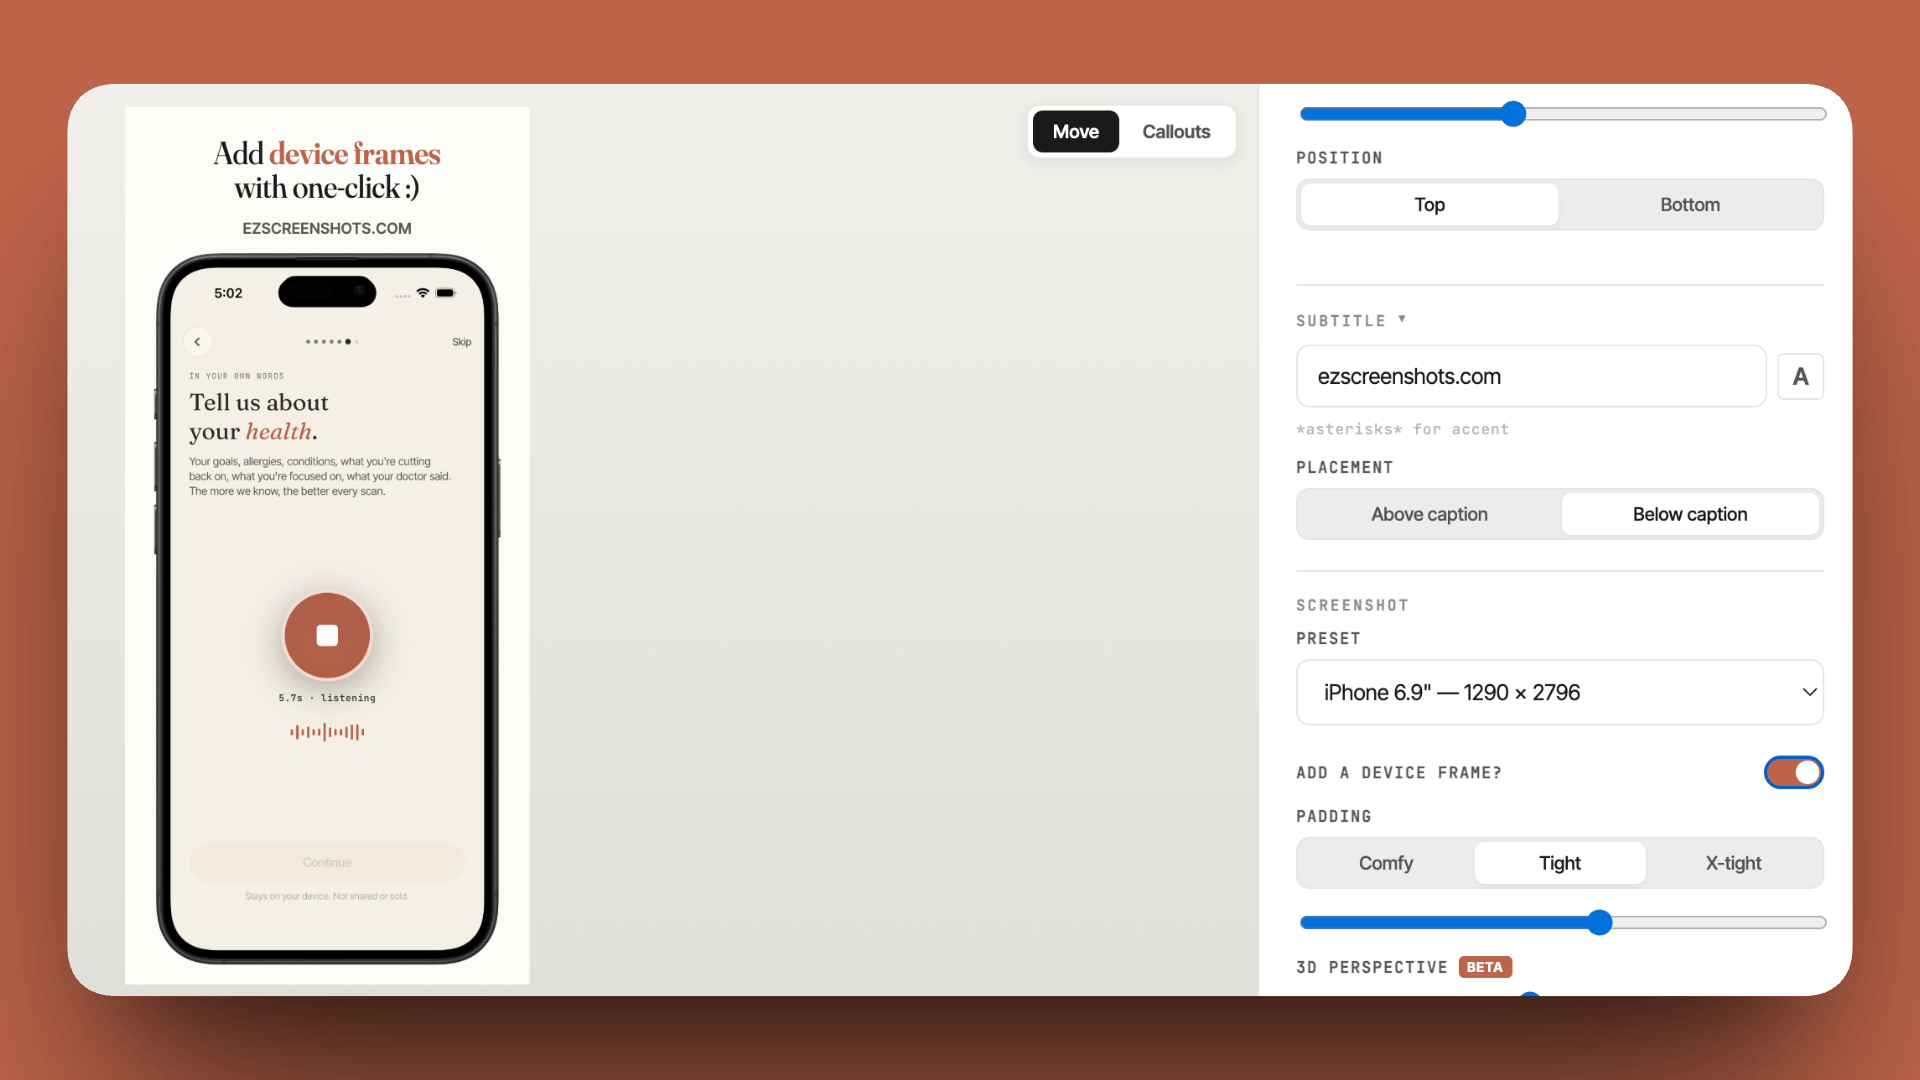
ezscreenshots includes device frame overlays for all current iPhone and iPad models, applied with a single toggle:
- Open ezscreenshots.com/app
- Drop or paste your Simulator screenshot into the canvas
- Toggle the device frame on using the frame button in the controls panel — it overlays the correct iPhone or iPad frame for your selected preset
- Adjust your background color or gradient so it contrasts with the frame
- Add your caption in the top third of the image (the crop zone visible in App Store search)
- Export at the correct dimensions for your device target
The frame automatically matches the device preset you've selected — if you're working on iPhone 6.9" screenshots, you get the iPhone 16 Pro Max frame; iPad preset gives you the iPad frame. Switching presets updates the frame. No manual resizing or repositioning.
If you need screenshots for multiple device sizes — Apple requires at minimum the 6.9" set; iPad screenshots are required if your app runs on iPad — ezscreenshots exports all sizes from the same design in one click, with the frame scaled correctly for each.
Getting the caption placement right with a frame
One thing to watch when adding a device frame: the phone frame itself takes up vertical space, and your caption needs to remain in the top third of the overall image (not the top third of the visible screen within the frame). In App Store search results, only roughly the top 40% of your screenshot is visible before a user taps through.
With a frame in place, this means your caption should sit above the phone — either overlaid on the background above the frame, or in the small space between the top of the image and the top of the device. Placing the caption inside the phone screen (below the frame's top edge) risks it being cropped out of search results entirely.
You can preview exactly how your screenshot will look in a search result before exporting — our post on previewing App Store search results covers the tools for this.
What about Android mockups?
The same principles apply to Google Play screenshots. Google Play doesn't have the same strict dimension requirements as the App Store, but a device-framed screenshot consistently reads as more polished than a raw screenshot in Play Store listings too.
ezscreenshots supports an Android Phone preset with the corresponding device frame — switching between iOS and Android presets updates both the canvas dimensions and the frame overlay. If you're shipping on both platforms, you can create the same screenshot set for both stores from a single session. For the full Play Store screenshot specifications, see our post on Google Play Store screenshot requirements.
Add a device frame to your App Store screenshot in one click
Drop your Simulator screenshot into ezscreenshots, toggle the device frame on, add your caption in the top third, export at the right dimensions. All device sizes, no Figma required. Free, no account needed.
Try ezscreenshots →Summary
- Device frames add context and polish — they tell viewers instantly this is a mobile app and create visual separation between UI and background
- Apple's guidelines allow framed screenshots as long as the content accurately represents the current app; use Apple's official Marketing Guidelines device artwork for guaranteed compliance
- Use a frame by default unless your screenshot has a strong full-bleed visual or is text-heavy enough that the frame takes too much space
- 3D perspective adds depth and differentiation — a slight tilt catches attention in search results without distorting legibility
- Caption placement with a frame: the caption must be above the phone, not inside the screen — it needs to be in the top 40% of the overall image to be visible in App Store search
- ezscreenshots applies the correct device frame per preset automatically — toggle on, set your background, add your caption, export all sizes in one click
- Android: same principles apply; ezscreenshots supports Android Phone preset with the corresponding frame